 For many moisture measuring applications, simply knowing the highest moisture content of a given material is enough to help guide your decisions. An example of this would be when testing drywall in restoration work. Here, if the moisture content is high, then the drywall needs to be dried out, or removed and replaced, depending on the severity of the water damage.
However, sometimes you need more information than what the highest concentration of moisture in a building material is. In some cases, you need to know the moisture gradient of materials such as wood.
What is moisture gradient, and when would you need to worry about it?
Defining Moisture Gradient
The Free Dictionary defines moisture gradient as “the difference in moisture content between the surface and the inner portion of a section of wood,” which is a good, basic definition of the term for manufacturers and contractors.
However, this term can be applied to materials other than wood. It’s just that wood, as a hygroscopic material sensitive to moisture differences, is the material most commonly being tested when moisture gradient is being measured.
When is it Important to Know the Moisture Gradient of a Material?
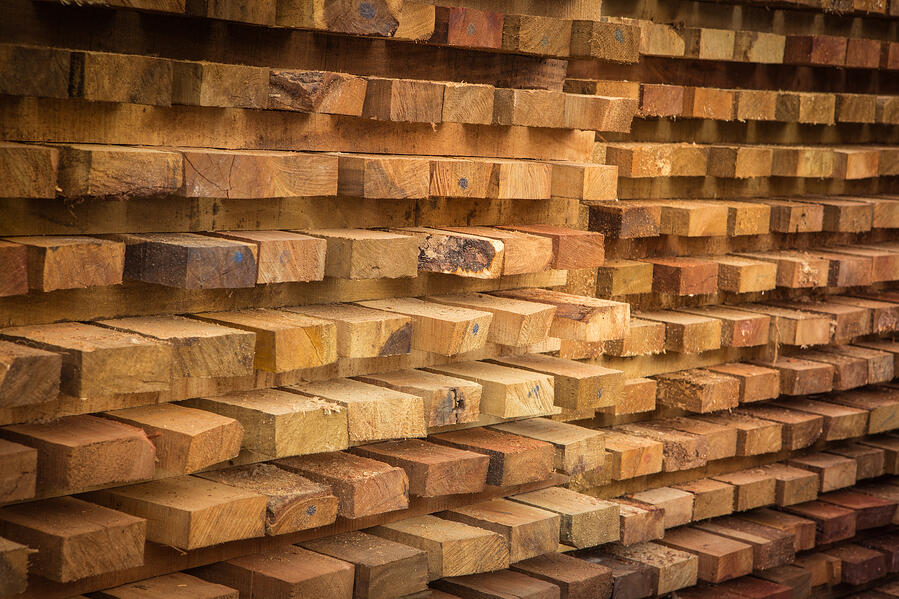
Wood product manufacturers will be the most likely to need to measure moisture gradient. This is especially true of companies that kiln-dry lumber in their manufacturing process.
When kiln-drying lumber, the distribution of moisture throughout the wood can have a significant impact on the quality of the finished product. If the surface is much drier than the innermost portion of the wood being dried, it can harden and crack, even though the overall moisture content of the wood is high.
Another reason you may need to know the distribution of moisture in a piece of wood between the shell and the core is that it can help you determine how long the wood will take to reach equilibrium moisture content. Moisture in the shell (closer to the surface) of wood tends to dry out faster than moisture in the core of the wood tends to take longer.
Only after wood has reached its equilibrium moisture content (EMC) with its environment can it be considered ready for use in whatever application comes next, such as:
- Furniture
- Flooring
- Building frames
What Tools are Best for Determining Moisture Gradient?
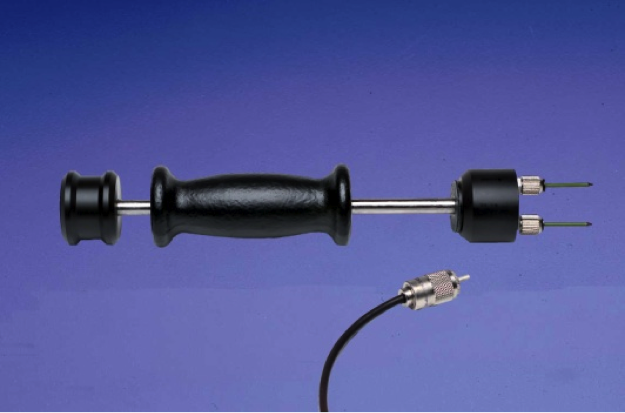
To measure the distribution of moisture in wood or any other material, you need the right tools for the job. The best tool for this job is a pin-type moisture meter with insulated contact pins.
Why the insulated pin-type meter, in particular?
Because, while a pinless meter is a highly useful tool for detecting moisture in wood and other building materials, such meters scan the entire cross section of wood in the scanning area and give a reading based on it. In other words, a pinless moisture meter cannot determine the distribution of moisture in wood.
Using a pin-type meter with insulated contact pins, on the other hand, ensures that only the material touching the tips of the pins is being tested. This eliminates surface moisture as a factor for core readings, and core moisture as a factor for surface readings.
With uninsulated pins, the electrical charge will follow the path of least resistance, meaning that you’ll get a result for the highest moisture content of the wood at any depth between the pins.
For example, if there is 25% MC at the shell level, and 15% MC at the core, and you stick uninsulated pins all the way to the core depth, you’d get a reading of 25% MC, because that’s the highest %MC of the material between the entire length of the pins. With an insulated contact pin, if you were to stick the pins in all the way to the core, your reading would be 15% MC, because the meter would only register the moisture content of the materials between the pin tips.
Determining the Distribution of Moisture in a Material Sample
Using a moisture meter with insulated pins or electrodes, make a series of shallow (i.e. shell-depth) readings with the pins penetrating about 1/4” into the surface of the material being tested.
Mark each site to make it easier to track and record your readings.
Repeat your measurements, but pushing the pins in deeper this time, getting near the core of the material. Here, you can either reuse the original insertion sites, or sites near them. Compare your two reading sets.
If the difference between the readings is close to one another, within 2 or 3 %MC for air-dried materials, and 1 %MC for kiln-dried wood, then the wood is most likely at or near equilibrium moisture content.
When you don’t have access to insulated pins for your moisture meter, getting a precise comparison of core and shell moisture can be a bit more difficult. However, you may be able to use regular, uninsulated pins to get a comparison.
First, make sure that the surface of the material is free of excess moisture, since this can and will skew reading results.
Next, push the pins about 1/16” (6mm) into the surface of the material being tested and take a reading. Record your results, push the pins in another 1/16” and take another reading. Repeat this process until you reach the maximum depth of the pins, or the core of the material.
The core should read as slightly higher in moisture content than the shell. If your reading doesn’t change, then it’s likely that the highest moisture content is near the surface of the material you’re testing and you might not be able to determine the %MC at the core of the material without insulated contact pins.