Warped wood is a common issue for lumber manufacturers, flooring installers, woodworkers—pretty much any professional who makes wood products. Wood warping can ruin both its aesthetic and practical value. For flooring wood, warping that takes place after the installation can ruin the wood and make the flooring uneven—leading to callbacks which waste time, labor, and materials for flooring installers.
In carpentry, warped wood can compromise the integrity of a structure, causing wood joists to not be properly aligned.
The question is this: What can be done to keep wood from warping—both at the manufacturing end and at the installation/final assembly site?
To help you maximize wood quality, here is a short guide on how to prevent wood from warping:
What Causes Wood Warping in the First Place?
Knowing the cause of warped wood is the first step in knowing how to prevent wood from warping. The primary reason why wood warps shape after it has been processed is that the wood has experienced a significant change in its moisture content (%MC).
Wood is a hygroscopic material—meaning that it will release or absorb moisture until it reaches an equilibrium with the surrounding environment. If the surrounding air is warm and dry, the wood will release moisture and dry out. If the surrounding air is wet, then the wood will absorb moisture from the air.
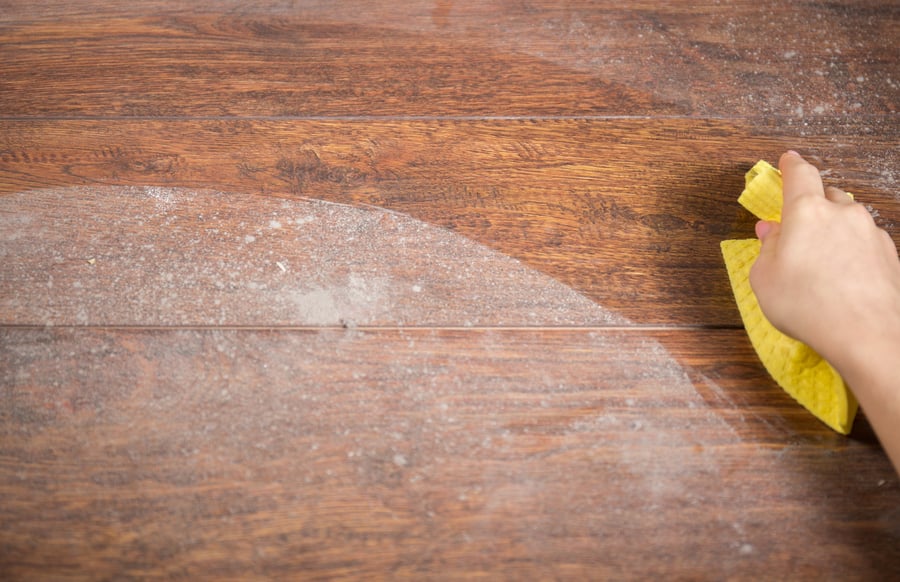
These changes in moisture content can cause the wood to change shape—contracting and cracking if too much moisture leaves, or swelling if too much moisture is introduced to the wood.
So, an important strategy for preventing wood warping is to control the moisture content of wood at the manufacturing and the installation site.
How to Prevent Wood from Warping: Controlling Moisture at the Manufacturing Site
Lumber manufacturers can maximize the quality of their lumber and prevent warped wood by strictly monitoring and controlling wood moisture content throughout their manufacturing processed and while storing wood prior to shipment.
Moisture Testing in the Kiln
Moisture testing in the kiln is crucial for ensuring high-quality lumber. Of particular importance in kiln-dried lumber is monitoring the distribution of moisture between the shell and core layers of the wood. If the moisture content in the shell and the core are too different, it could be an indication of a flaw in the drying process that needs correcting.
For example, if the shell of the wood is dry, but the core is wet, that could indicate that the kiln is being operated at too high a temperature—causing the shell to dry out faster than the moisture at the core can be released. This, in turn, can lead to warps in the wood or cracks in the surface if the drying process isn’t corrected.
Lumber manufacturers can monitor lumber moisture content in the kiln by using an in-kiln monitoring system and a wood moisture meter combo—such as the KIL-MO-TROL system and the J-2000 wood moisture meter. Here’s how it works:
The lumber manufacturer sets up their lumber in the kiln, then uses a series of probes at different drying stations to puncture the lumber. The longer probes should have insulated pins for reading core moisture, while the shorter probes check the shell moisture. Each probe will have an insulated wire running from the testing station to the KIL-MO-TROL station.
The KIL-MO-TROL system acts as a switchboard for the moisture testing stations in the kiln. The lumber manufacturer selects the station they want to check and connects the KIL-MO-TROL to the moisture meter. Once connected, the moisture meter can be activated—providing a moisture measurement for the currently selected station. Then, the KIL-MO-TROL can be cycled through each station until they have all been tested.
This allows lumber manufacturers to quickly complete moisture testing in the kiln without having to interrupt the drying process.
Testing Relative Humidity Conditions at the Storage Site
Another important aspect of preventing wood warpage is to strictly control the relative humidity (RH) conditions at the storage site prior to shipping wood out. Relative humidity can affect the quality of wood in a few different ways, but the primary reason why it’s important for storage is that if the RH levels of the storage site are too different from the destination, then the wood may warp after reaching the installation site.
So, lumber manufacturers need to control the RH conditions in their lumber storage facilities. This typically starts with the use of a thermo-hygrometer to measure the relative humidity of the air in the storage facility.
A thermo-hygrometer can check the ambient temperature and moisture saturation of the air to determine how close the air is to its saturation point—which is presented as an RH reading. The operation method for most thermo-hygrometers is relatively simple: Just hold the meter in the air and push the button.
To get the best results, it’s important to:
- Avoid Areas with Restricted Air Flow. RH testing should be done in an open area where the air will be a good representation of the conditions in the storage area. So, avoid taking readings in corners or alcoves, where the flow of air may be restricted.
- Check the RH Meter’s Sensor Element. Over time, an RH meter’s sensor element may be damaged by prolonged exposure to the air. This causes the meter to become less accurate. Checking the sensor element is important for ensuring accurate RH measurements.
- Take Multiple RH Readings. Even the most accurate thermo-hygrometers have a margin for error—known as sensor tolerance—that may cause a variance of +/-2% between the indicated RH and the actual RH. So, when testing the relative humidity for a given area, be sure to take multiple readings and average the results. This should produce more accurate results than taking a single reading.
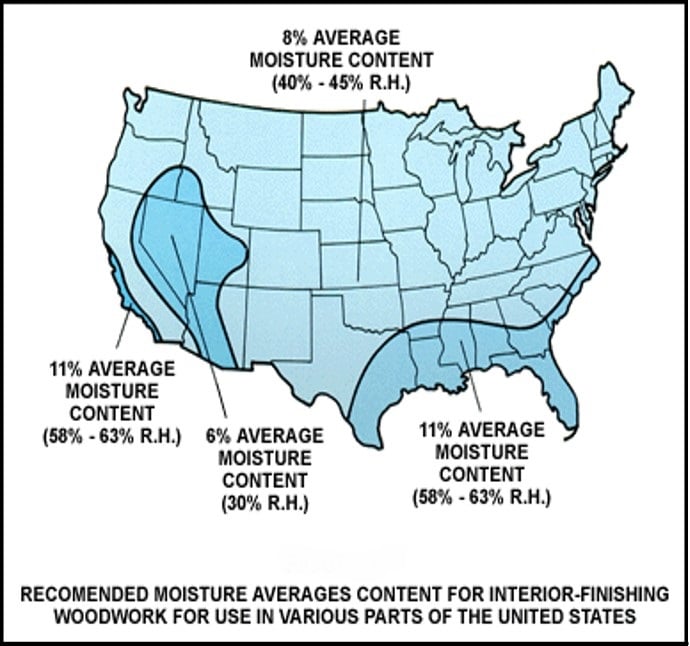
What should the RH conditions be for the storage site? The answer to that depends on the destination of the lumber held in the storage site. If the lumber is destined for use near coastal areas in the southeastern or southwestern USA, then the RH should be kept at around 53% to 63%. If the lumber is destined for the desert, then the RH at the storage site should be close to 30% RH. For most of the rest of the USA, the RH of the storage site should be between 40% and 45% RH. Keeping the RH of the storage site near these values should maintain the moisture content of the wood near enough to the equilibrium moisture content that the wood will have at the installation site.
How to Prevent Wood from Warping: Controlling Moisture at the Installation Site
Even when lumber manufacturers do a perfect job of controlling the moisture content of wood during the manufacturing process, conditions at the installation site (or during transit) can still negatively impact the quality of wood or cause it to warp.
So, when preparing to install wood, whether it’s construction lumber for building supports or wood flooring going into a finished structure, it is necessary to monitor and control the moisture content of the wood. Here are a few tips for preventing wood warping at the installation site:
Acclimating Flooring Wood Before Installation
In most cases, unless there is a major source of moisture intrusion in a structure or the wood was extremely far from its EMC value prior to installation, flooring wood should not warp significantly after installation. However, to prevent callbacks and ensure the best quality of flooring installation, it pays to be careful.
Part of this process is verifying the acclimation of wood flooring before installing it. The basic process for acclimating wood flooring prior to installation includes:
- Turning on the HVAC System. Prior to installing wood flooring, it’s important to make sure the climate control system for the structure is on and set to whatever temperature conditions will be typical for the structure at least 24 hours in advance. This helps ensure that the wood flooring can be acclimated to the conditions it will be continuously exposed to.
- Checking the Relative Humidity of the Installation Site. Checking the RH values for the installation site can be a fast way to establish what the equilibrium moisture content of the wood should be. Otherwise, the testing of the wood could take days of repeated %MC measurements until the value stops changing.
- Testing the %MC of the Flooring Wood. After testing the RH of the installation site, take a measurement of the moisture content for the flooring wood. If the %MC is close to what the EMC should be for the RH conditions at the site (within 1.5% or less), then the wood should be ready for installation. If the wood is not at its EMC, then it should be given more time to acclimate to conditions in the installation site.
Even if the wood gains or loses enough moisture to slightly change shape prior to installation, once it reaches EMC, it should stabilize and be fixable. However, exercise caution when attempting to sand down swollen wood planks—if the humidity conditions change later, it could cause the flooring to become slightly concave where it was sanded down.
By making sure the wood is at its EMC value prior to installation, many flooring failures besides warped wood can be prevented.
Checking Surrounding Materials for Signs of Moisture Intrusion
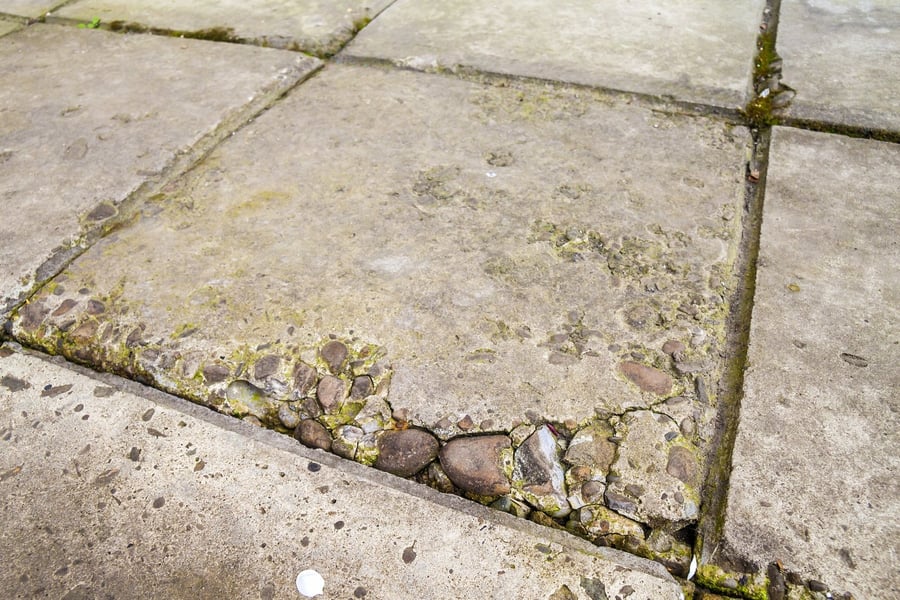
One of the most common reasons for flooring failures after installation is the presence of excess water in the structure. Moisture intrusion can ruin wood that was at its perfect equilibrium moisture content previously. In new construction, issues such as burst pipes are rare, but one easily-overlooked culprit is excess moisture in concrete.
Newly-poured concrete may have excessive amounts of moisture. As the concrete dries/cures, this moisture may be released into the flooring installed above it. So, prior to installing flooring wood over a concrete subfloor (particularly a newly-poured one), it’s important to make sure the concrete is sufficiently dried.
The best way to do this is to use the ASTM F-2170 concrete testing method, which uses a thermo-hygrometer with in-situ probes to check the moisture conditions deep in a concrete slab.
Why not use a moisture meter? Aside from there being no true concrete moisture testing scale (because different concrete mixes have different physical properties, making creating a concrete scale impossible), moisture meters simply wouldn’t penetrate far enough into the concrete to get a reliable reading.
The basic process for testing concrete with the ASTM F-2170 method is:
- Drill holes that go at least 40% of the way through the concrete slab. The number of holes needed depends on the size of the slab—at least three holes for slabs up to 1,000 square feet in size, and one extra hole for each additional 1,000 sq. ft. afterward.
- Vacuum the holes to remove loose debris.
- Insert a sensor sleeve into the hole and cap it.
- Wait 24 hours for the capped holes to acclimate
- Insert the in-situ probes and take a reading with the thermo-hygrometer.
This should give you an idea of how much moisture is deep in the concrete slab, and whether that moisture poses a risk to any wood building materials being installed over the slab.
Curious about how to check for moisture in a structure? Or, do you need more advice for testing lumber in the kiln? Whatever moisture content measurement questions you might have, feel free to reach out to Delmhorst for answers!