Restoration experts carry out their work year-round in all kinds of weather. While the chill of winter sounds like an inconvenient time to start a building restoration project, time is often of the essence for minimizing the damage caused by moisture intrusion. When working in wintry conditions, it’s important for water damage restoration experts to take some extra precautions to ensure they can perform top-quality restoration work and avoid injury.
With this in mind, here are a few tips for winter restoration projects:
1: Wear at Least Two Layers of Clothes
Experienced building restoration pros who frequently work in the cold already know to wear two layers of clothes for insulation against the cold. However, workers who are more used to the warmer temperatures of the South may not be as prepared for cold snaps.
When working on building restoration projects in the winter, it’s important to wear at least two layers of clothing. Preferably, the outer layer should be something that is water-resistant to keep snow or cold water from soaking it (wet clothing can sap body heat and bring about hypothermia). The inner layer should be something reasonably thick and insulating to keep you warm.
Even if the majority of the restoration project is taking place indoors, having sufficient insulation is important—there may be a reason to inspect the exterior of the building to track down a moisture intrusion source.
2: Wear Slip-Resistant Boots for Checking the Roof
It is a common occurrence for snow to build up on the top of a structure’s roof. If the space just below the roof is heated, it can cause the snow to melt partially and may re-freeze into ice from there. This ice can sit hidden underneath a thick layer of snow on the roof, creating a hidden slip and fall hazard for building restoration experts.
Wearing thick, slip-resistant boots helps to mitigate this risk somewhat. It can also be helpful to clear any snow from a roof prior to setting foot there to make sure there aren’t hidden ice sheets underneath.
3: Remember to Account for Temperature Corrections When Testing Moisture
Moisture meters are a critical tool for building restoration work, helping restoration experts pinpoint moisture intrusion sources so they can be property remediated. Pin-type moisture meters are an especially popular tool because they can work in a variety of building materials which would be impossible to test with a pinless meter, such as insulation.
However, one issue with using pin-type moisture meters for winter building restoration projects is that extreme cold can affect the accuracy of a moisture measurement. This is because pin moisture meters use the principle of electrical resistance to measure moisture in building materials—and low temperatures can have a minor, but noticeable, impact on conductivity.
This, in turn, throws off the accuracy of a moisture measurement, causing it to register less moisture than is actually present in the building materials being tested. So, to ensure complete accuracy, it’s important for moisture meter experts to apply temperature corrections to their moisture reading results when working in freezing temperatures.
Alternatively, bringing a pinless meter can also be useful, since the moisture measurement method is different and won’t be affected unless the building materials being tested are frozen solid.
4: Bring Spare Moisture Meter Electrodes
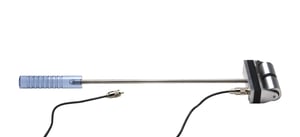 Another pro tip for any building restoration job being done in the winter: bring spare moisture meter electrodes and pins—especially if working outside in freezing temperatures. Extremely low temperatures can make moisture meter electrodes more brittle than normal—increasing the risk that they will break if forced. The same goes for moisture meter pins.
Mishaps are a given on any restoration project—cold or wet hands could fumble a meter, ice could make a worker slip, or someone could try to push a set of pins or a probe into a surface with just a little too much force. So, bringing a few spares can be incredibly useful for making sure that moisture testing can continue after a mishap.
5: Check the Moisture Meter’s Calibration Before Each Shift
Restoration projects can take a long time to complete, and it’s important to make sure that the moisture measurements you’re making are as accurate as possible. To this end, checking the accuracy of the moisture meter prior to each working shift can be incredibly helpful. There are many ways to check moisture meter accuracy, but some of the most convenient are:
- Using a Moisture Content Standard (MCS). A moisture content standard is a purpose-built device for checking the calibration of pin-type moisture meters. With this device, a user simply has to tap the pins of their meter to the correct metal bumps on the MCS and take a reading. If the reading matches what the MCS is supposed to register, then the meter is accurate. It’s important to note that these devices have to be made for the specific moisture meter they’re used to test.
- Using Sensor Blocks. These are similar to moisture content standards, but are meant for pinless meters. Each block is made for a specific model of pinless meter, so it’s important to match the sensor block with the right moisture meter.
- Using Built-in Calibration Checks. Some higher-end moisture meters have built-in calibration checks. These are generally considered the easiest solution, since there’s no extraneous tool to lose or mix up. Simply push a button and see if the meter is functioning correctly.
By checking the calibration of a moisture meter prior to using it for a restoration project, it’s possible to avoid taking (and then trying to rely on) erroneous moisture measurements.
Want more advice for conducting winter restoration projects? Or, do you need help finding the right moisture meter for winter restoration work? If so, please talk to a moisture meter expert from Delmhorst today! We’ll be happy to answer any moisture testing questions that you might have.