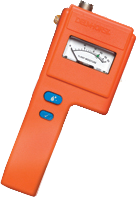
When the average person thinks about hardwood flooring installation tools, they’re usually thinking about things like hammers, carpentry nails, glue/putty, and other basic tools used by amateurs everywhere. However, there are some tools that professionals use which separate their hardwood flooring installation work from the work done by an everyday amateur—tools like moisture meters and thermo-hygrometers.
Thermo-hygrometers can be used to determine the relative humidity (RH) conditions at the installation site, while moisture meters can be used to verify the current moisture content (%MC) of hardwood flooring prior to installation. This, in turn, can help prevent hardwood flooring installation
Knowing when and how to use these tools can mean the difference between a flawless installation job and having to deal with costly callbacks and damaged flooring replacement.
With this in mind, here are a few hardwood floor installation tips to keep in mind when using moisture testing tools:
1: Always Check Subfloor Moisture Prior to Installation
Excess moisture in a subfloor can cause issues for the rest of the flooring system when you install it. Hidden pockets of moisture in the subfloor can cause hardwood flooring to swell, leading to buckling or cupping. Plus, it can promote the growth of mold, leading to potential respiratory hazards or weakened, rotted wood.
When working with a concrete subfloor—especially one that is freshly-poured—it’s important to follow the ASTM F-2170 testing standard. This is a moisture testing standard specifically developed for concrete that uses thermo-hygrometers with in-situ probes to check the relative humidity (RH) conditions deep in the slab.
For wooden subfloor material tests, a wood scale moisture meter can be used to determine moisture content.
2: Choosing Between Pin and Pinless Meters to Test Flooring Wood
Flooring moisture meters come in both pin and pinless varieties:
- Pin-Type Moisture Meters. These meters determine moisture content in wood by using the principle of electrical resistance. Since wood is an insulator and water is a conductor, the more resistance there is to the electrical current, the drier the wood, and vice versa.
- Pinless Moisture Meters. These devices use electromagnetic radio frequency waves to “scan” the wood that’s in contact with the plate on the meter’s underside. Distortions in the radio wave are used to measure the amount of moisture present. Requires a flat surface for best accuracy.
 Pinless meters have the advantages of being able to scan large areas quickly without leaving behind pinholes. Pin meters, on the other hand, tend to be useful for pinpointing the exact depth of a moisture pocket in wood.
Some flooring installers swear by one type or the other, and there are situations where one might be superior for a particular task. For example, if you want to quickly test every last piece of hardwood flooring you’re installing, then a pinless moisture meter is faster and easier to use than a pin-type one. However, if you need to test any materials that are too small or unevenly-shaped for the scanning plate of a pinless meter, then a pin-type moisture meter will work better.
Some contractors who have to test more than just flooring materials use combination 2-in-1 devices that have multiple reading scales—allowing them to test moisture in a wide variety of materials with a single tool.
3: Make Sure All Climate Control Systems Are On Before Testing Moisture Content
The equilibrium moisture content (EMC) value of wood changes in response to its surroundings. For example, wood at 7.7% MC would be in equilibrium in a space with a temperature of 70 degrees Fahrenheit and 40% RH. However, that same %MC reading in a room at 90 degrees Fahrenheit and 65% RH would be too dry, and would start soaking up water until it reached 11.5% MC—causing the wood to swell.
Climate control systems in a structure can massively impact the temperature and relative humidity conditions therein. So, when installing hardwood flooring systems, it is crucial that such systems are turned on and set for their everyday use settings prior to making moisture tests.
Once turned on, the climate control system should be given at least a full day to allow the structure to acclimate. This way, when you test the RH conditions at the installation site, you’ll know they’re representative of what the flooring will be exposed to on a daily basis—and thus, how likely the moisture content of the wood is to change after installation.
Learn more about using moisture meters for hardwood and other flooring systems by downloading Delmhorst’s Complete Guide to Measuring Moisture in Flooring Systems today! Or, contact us for answers to your moisture meter questions.

Comments